ESPHome is a beginner-friendly platform that enables the user to build their own diy smarthome sensors. Supported are ESP32, ESP8266, RP2040, BK72xx, RTL87xx wich are cheap microcontrollers and a large selection of sensors. No programming is required, the configuration of the sensor takes place in a .yml file. The platform allows OTA-Uptdates over wifi to the controllers which makes configuration changes easy.
Parts
- HomeAssistant Installation
- ESP8266 / Wemos D1 Mini: Amazon
Requirements
- HomeAssistant over https
- Browser with WebSerial API: supported Browsers
Installation of ESPHome
When running HomeAssistant in Supervised Mode (in a VM or on a Raspberry PI) you can add ESPHome via the Add-ons section:
Settings -> Add-ons -> + ADD-ON STORE -> ESPHome -> Install
Make sure to enable the options: Start on boot and Show in sidebar
ESPHome can also be installed on a seperate Docker Container.
Setup of ESPHome
Go to the ESPHome page and click on SECRETS in the top right. The secrets file is useful for storing sensitive information like WIFI Credentials and API Keys in a centralised place. These credentials can be accessed from the device config.
Enter your WIFI SSID (name) and Password in the secrets file:
wifi_ssid: "myWifiName"
wifi_password: "myWifiPassword"
Adding new Device
Click on + NEW DEVICE. Give the device a descriptive name, the id will be generated from that name and cannot be changed. Connect the ESP8266 directly to your computer over USB. Click the CONNECT and select the USB-Port used by the ESP8266. You might need to press the reset button on the board.
Once your device is flashed it will automatically connect to your network and you will be able to flash it in the future with OTA-Updates.
Start by editing the device.yml so the top looks like this:
esphome:
  name: sensor-name
  friendly_name: sensor-name
  platform: ESP8266
  board: d1_mini
Remove this below:
esp8266:
  board: esp01_1m
You can add a webserver on port 80 to view the configured sensors. Be careful, with this configuration anyone in the same network can upload a new firmware without authentication.
web_server:
  port: 80
Adding Sensors
When adding a sensor it is recommended to unplug the ESP8266 from power. For experimenting with components it is useful to do so on a breadboard.
Motion Sensor [AM312]
The AM312 motion detector is a pyroelectric infrared (PIR) sensor that detects motion by measuring changes in infrared radiation. It works by comparing the infrared energy received by the two pyroelectric elements in the sensor. When a warm body, such as a person, passes in front of the sensor, it creates a change in the infrared energy, triggering the sensor to output a signal indicating motion detection.
binary_sensor:
  - platform: gpio
    pin:
      number: D2
      mode: INPUT_PULLUP
      inverted: true
    name: "myMotionSensor"
Where to get: Amazon
by: Leo Rassl
Ultrasonic Proximitysensor [HC-SR04]
The HC-SR04 ultrasonic module measures distances from 2 cm to about 3 m with a 3 mm resolution. It runs on a simple 5V power supply and uses less than 2mA of current. Once triggered by a falling edge (TTL level), it automatically measures the distance and converts it into a PWM signal at the output. Each measurement cycle takes 20 ms, allowing for 50 measurements per second. It’s used for obstacle detection, distance measurement, level indicators, and industrial applications.
For connecting the module, it is pretty straight-forward, in total there are 4 pins, a VCC pin (power supply pin – in this case 5V), one ground pin (Connects to negative power supply), a trigger pin (sends ultrasonic pulse signal) and an echo pin (receives reflected pulse signal).
sensor:
  - platform: ultrasonic
    trigger_pin: D0
    echo_pin: D8
    name: "Distance Sensor"
    update_interval: 1s
Where to get: Amazon
by: Raffael Becirevic
Relay Module [ELEGOO Relay Module]
A relay module is an electronic device that allows the control of a high-voltage or high-current circuit using a low-voltage signal. The relay modules are used to control appliances, lights, and security devices. Despite being bigger that solid-state switches, mechanical relays are durable and can handle high currents and voltages.
switch:
  - platform: gpio
    name: "Relay1"
    pin: D3
    id: relay1
Where to get: Amazon
by: Berkant Ataman
Button
The button sensor is an analog input component used to detect press events. When pressed, it triggers a specified action, such as toggling a relay.
binary_sensor:
  - platform: gpio
    pin:
      number: D7
      mode: INPUT_PULLUP
      inverted: true
    name: "Button"
If you want to toggle a Switch on that ESP8266 you can do this directly on the microcontroller:
binary_sensor:
  - platform: gpio
    pin:
      number: D7
      mode: INPUT_PULLUP
      inverted: true
    name: "Button"
    on_press:
      then:
        - switch.toggle: relay1
Where to get: Amazon
by: Josef Al-Ramahi
Temperature and Humidity Sensor [DHT11]
The DHT11 sensor is designed to measure both temperature and humidity. It is commonly used in a variety of applications, including weather stations, home automation systems, and any environment that requires accurate monitoring of humidity and temperature levels. The sensor outputs digital data, making it easy to interface with microcontrollers and other digital systems.
In this setup, the Data pin is connected to GPIO pin D1 on a microcontroller, allowing it to send temperature and humidity data.
sensor:
  - platform: dht
    pin: D1
    temperature:
      name: "Temperature"
    humidity:
      name: "Humidity"
    update_interval: 30s
Where to get: Amazon
by: Theo Hubinger
i2c Devices
i2c is a bus that allows multiple sensors to publish their data on the same bus.
i2c:
  sda: D6
  scl: D5
  scan: true
  id: bus_a
With the scan option the bus is scanned on boot and all the devices are displayed in the log. When new device is found you can copy the address and reference it in the sensor:
[16:55:09][I][i2c.arduino:054]: Results from i2c bus scan:
[16:55:09][I][i2c.arduino:060]: Found i2c device at address 0x23
Now we know that the address of the device on the bus is 0x23 and we can use it in the device configuration. The scan option can be set to false if the devices are configured.
Luminance Sensor [BH1750]
The GY-302 BH1750 brightness sensor measures ambient light levels and outputs the measurements in Lux. This makes it ideal for smart homes, where something might need to be automatically adjusted based on the light level.
sensor:
  - platform: bh1750
    name: "Helligkeitssensor"
    address: 0x23
    update_interval: 30s
Where to get: Amazon
by: Constantin Zeller
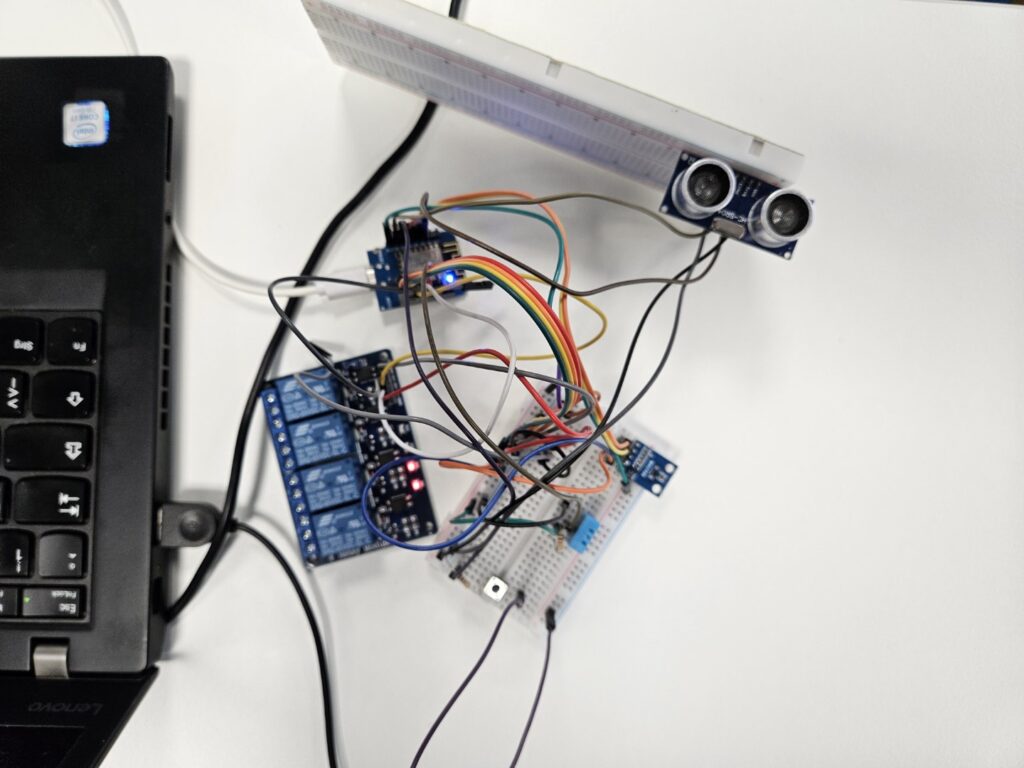
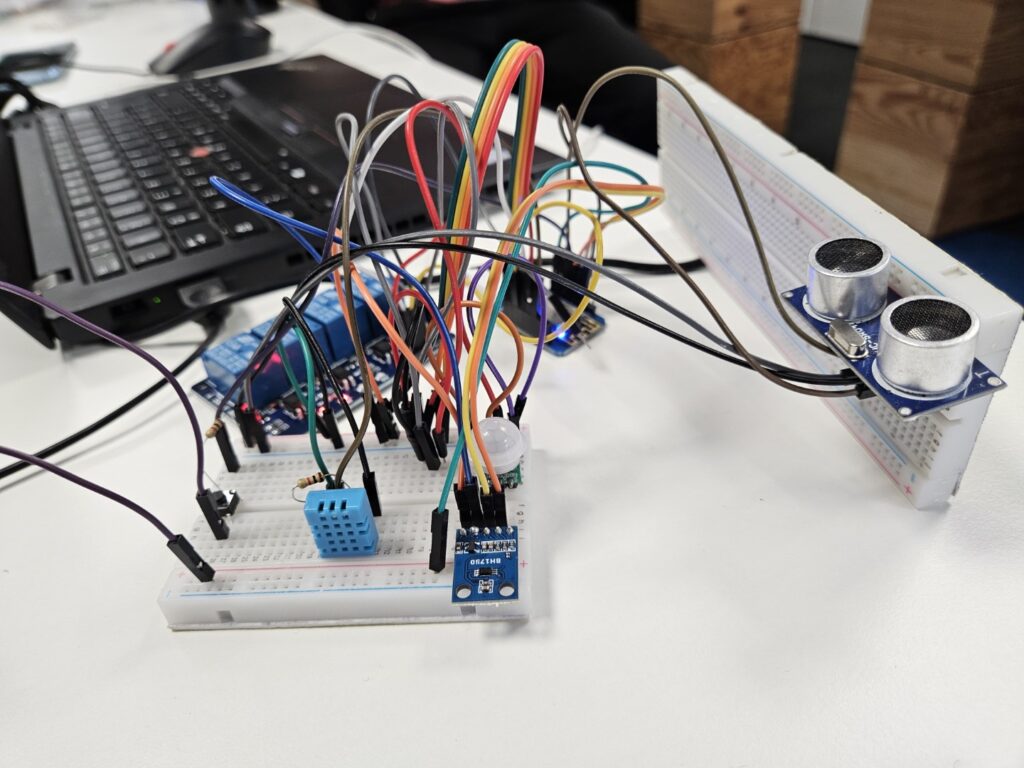
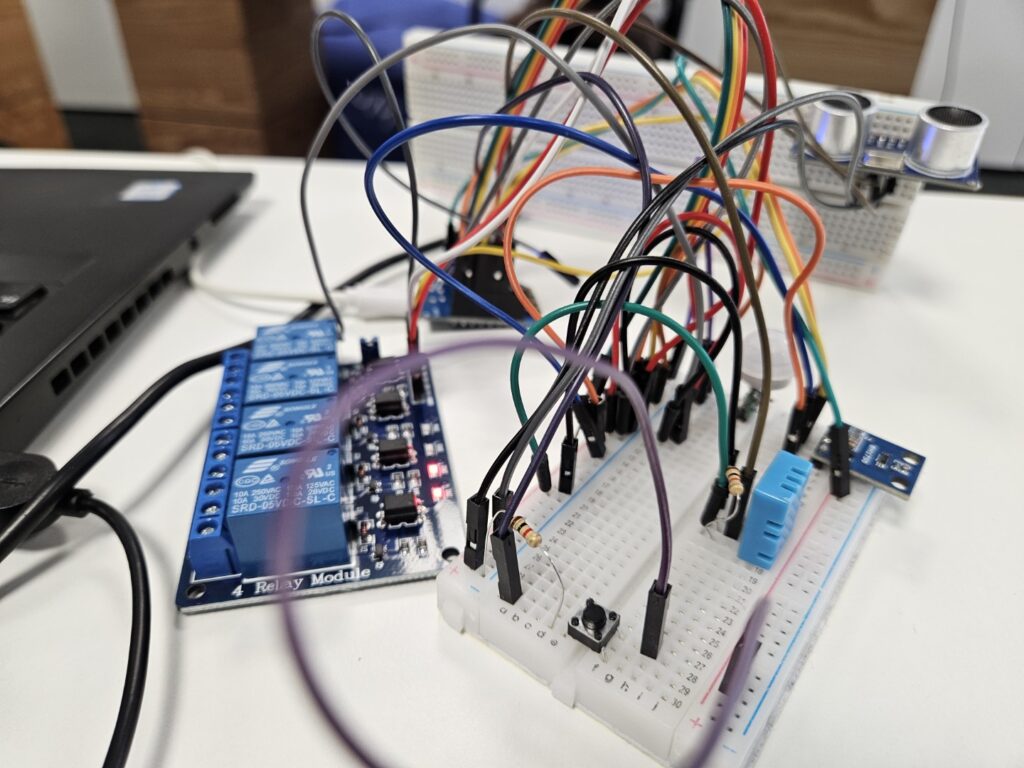
Our final setup after connecting all sensors:
View the full code on our wiki: ESPHome Beginner Tutorial
This post was created at a summer interns programm at IT-Power Services.
… [Trackback]
[…] Informations on that Topic: technologiehub.at/project-posts/tutorial/esphome-beginner-tutorial/ […]