Introduction
DISCLAIMER: This post has been moved from my personal website to here, originally authored 02.10.2022
Deep Object Pose Estimation (DOPE) is a deep neural network, which can be used to determine the 6DoF position of any object. For that, only a RGB image is needed as input! With sufficiant accuracy, this is a game changer in the robotics world! If this sounds too good to be true, try it out yourself with the steps provided in this article!
To be fair, the network will not run on any edge device (at least not fast enough for a live feed). Also, for data generation and training, a relativly capably GPU should be used. Fortunatly, I had a NVIDIA GeForce 3080 at my disposal during my summer internship. For refference, the system I used for training had CUDA version 11.7 and Ubuntu 20.04 installed. However, with small changes in the code, you should be able to run the training code on any other NVIDIA GPU (probably significantly slower though).
This whole article is based upon the official GitHup repository of the ROS package. You can find the modified code for the system I used on my GitHub page (this is needed if you want to use CUDA version 10.3 and above).
To the structure of this post:
- At first I want to give you a brief explanation of the concepts in use
- Then, the way to run a pretrained model is shown
- Afterwards, Synthetic data generation using NVISII will be explained
- It is shown how this data is then used to train your own model
- And how to run the inference on your machine
If you plan to follow along, make sure you have a workstation with a NVIDIA GPU and Ubuntu 20.04 installed. Now grab yourself a coffee and let’s start!
Good to know
CUDA
6DoF
In robotics, 6DoF refers to “six degrees of freedom”. In this case, it is soley the description of a pose in 3D space. Six variables are needed to define the pose of an object, as in addition to the x, y and z coordinates, the direction in which the object is facing is also important. Therefor, the 6DoF pose of an object consists of x, y, z and the angles ψ (psi), θ (theta), φ (phi). Note that when using these terms usually, position refers only to the coordinates (x, y, z) and pose also includes the orientation. Visit this page for further information.
ROS
Neural Network Vocabulary
Model
Training
Inference
Synthetic Data
AI (artificial intelligence) needs data to be trained. In fact, some might argue that the data is even more important than the network itself. Thereby comes the question: How do we get this data? In the case of 2D images the process of labeling is simple (but also strenuous if done manually) . For example, one only needs to put a rectangle around the object the network should learn to recognise. This process done to a whole bunch of images (usually between 10k and many million labels) results in a dataset that can be used to train the network. This process is already tedious, but for 3D recognition it becomes close to impossible. This is where synthetic data generation comes in. When automating this process within a virtual environment, the resulting data is called synthetic data. Here, the images are not taken from the real world, rather within a simulation. The better the simulation, the better are the results. Also, as a simulated environment is used, the whole domain can be strongly randomized. Research has shown that this sort of randomized data is best for most neural networks. This is a pretty new field of AI, so new information gets published at a high pace. Have a look at this post for a better understanding.
Setup
As the provided DOPE-repository on GitHub is based upon ROS, ROS has to be installed first. You have to be careful to choose the correct version. One could also use ROS2, this is not covered in this post though. In my case (Ubuntu 20.04) the correct version of ROS is noetic. If the following terms are not familiar to you, please read up on it in the ROS documentation.
- Install ROS-noetic
- Create catkin workspace with
- mkdir -p
- ~/catkin_ws/src # Replace `catkin_ws` with the name of your workspace
- cd ~/catkin_ws/
- catkin_make
Now that we have set up our ROS workspace, we can start to implement the DOPE code. Therefor you can use the original repository (note that you have to make adjustments to the code, depending on what system you are using), or use the modified version on my GitHub page (for Ubuntu 20.04 and CUDA 11.6). The following guide will describe the use of my modified version. If you want to know what parts of the repository need to be changed, simply contact me. For the camera, I use a Realsense, however you can use any camera that publishes to the TODO topic, provided you change the code in the src/dope/config/config_pose.yaml file accordingly.
- Download DOPE-ROS
- cd ~/catkin_ws/src
- git clone https://github.com/Geibinger/DOPE.git dope
- Install python dependencies
- pip3 install –pre torch torchvision –extra-index-url
https://download.pytorch.org/whl/nightly/cu116 - cd ~/catkin_ws/src/dope
- pip3 install -r requirements.txt
- pip3 install –pre torch torchvision –extra-index-url
- Install ROS dependencies
- cd ~/catkin_ws
- rosdep install –from-paths src -i –rosdistro noetic
- sudo apt-get install ros-noetic-rosbash ros-noetic-ros-comm
- Build
- cd ~/catkin_ws
- catkin_make
To be able to use the realsense camera for object pose estimation, install the corresponding ROS package:
- apt-get update
- sudo apt-get install ros-$ROS_DISTRO-realsense2-camera
Now that everything is installed, we can try out the pretrained weights in the next chapter.
Usage with Pretrained Models
In order to test the system, we can use the provided pretrained models. In the picture below, you can see a sample of what objects are at our disposal. “But I don’t want to know the position of tuna cans” I can hear you think. We will get to how you can estimate the pose of any objects in a minute. However, the process in this section also applies when using any weights (so also the custom ones).

To start the model with the pretrained weights, follow these steps:
- Prepare the pretrained weights
- Download one or more of the pretrained weights here (we will create our own weights in the following chapters)
- save them in ~/catkin_ws/src/dope/weights/
- Start ROS master
- cd ~/catkin_ws
- source devel/setup.bash
- roscore
- Start realsense node in separate terminal
- roslaunch realsense2_camera rs_camera.launch
- Start dope node in separate terminal
- roslaunch dope dope.launch (if you get an error, try reloading your catkin workspace with source devel/setup.bash)
- Start rviz for visualization in separate terminal
- rviz
Now, the rviz window should appear. Here you can display your camera feed, as well as the dope output by adding the corresponding listeners. To do that, click on the “Add” button in the bottom left corner and select the relevant topics.
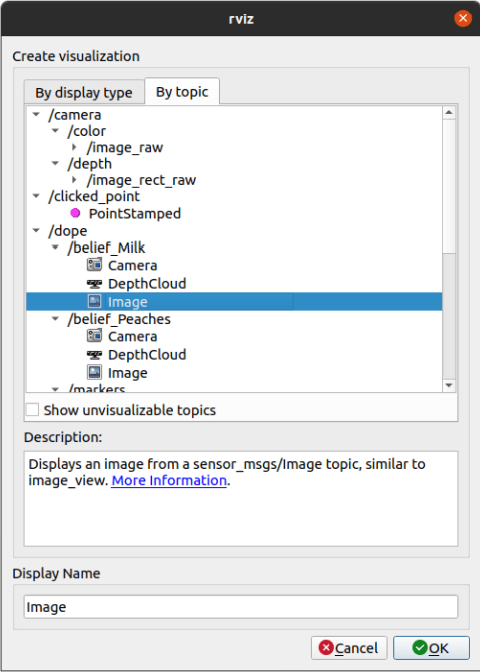
In this case, as the milk demo weights are used, the topic listed is /belief_Milk. For all the published topics from the dope node, run:
- rostopic list /dope
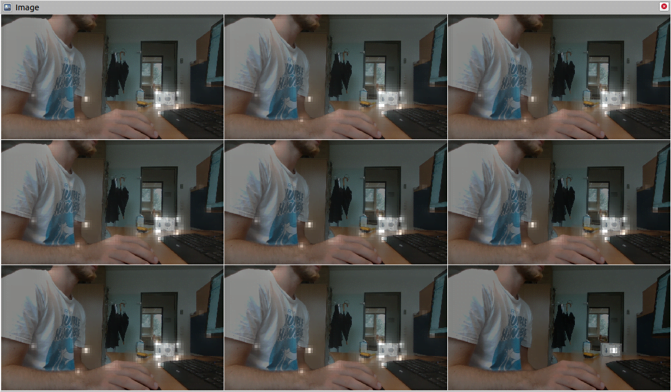
In my case, the /belief_Milk-image topic looks like this (I’m using the image of the models, as I do not have a similar Milk box). To be fair, I’m not sure why there are nine different outputs, this might be due to the higher image resolution (one should be able to mend this issue by downscaling, I did not try it out yet).
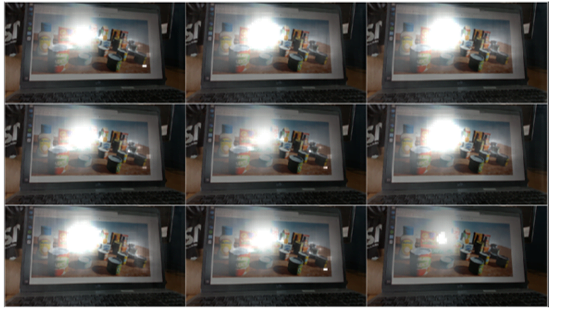
The bright white colour shows the belief of the edge positions of the object (in this case milk). The corresponding 6DoF position can be received by listening to one of the provided dope topics (for example /dope/belief_Milk).
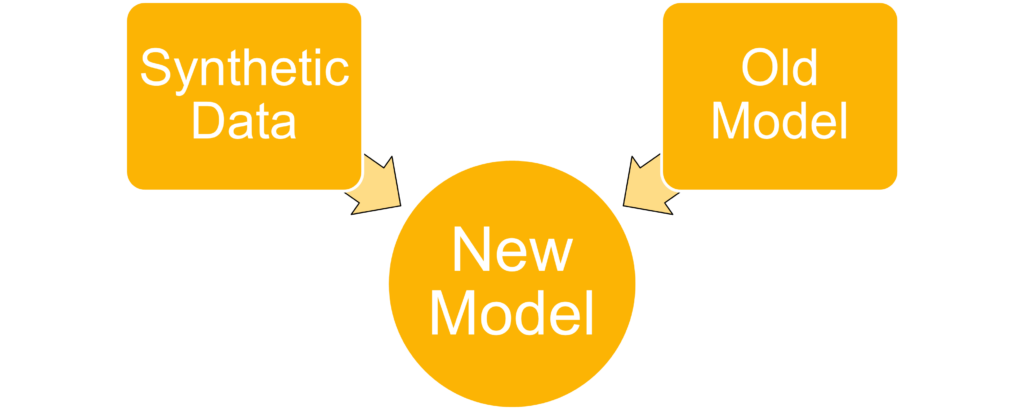
Transfer Learning
As it is not particularly useful to locate the provided household objects, new weights need to be generated. This can be done by a process called Transfer-Learning, in which a existing network is trained to execute a different, but similar task.
To achieve this in the case of DOPE, a training script is provided in the scripts/train folder. To generate the data used for this script, NVISII is used (hardware accelerated render engine). The corresponding files are located in scripts/nvisii_data_gen/. The next section will describe the usage of this generator.
Synthetic Data Generation
As stated above, the scripts for generating synthetic data use the NVSII tool. To set up the generation process, the models for the object to locate, the HDRI scene and the distractor models are needed.
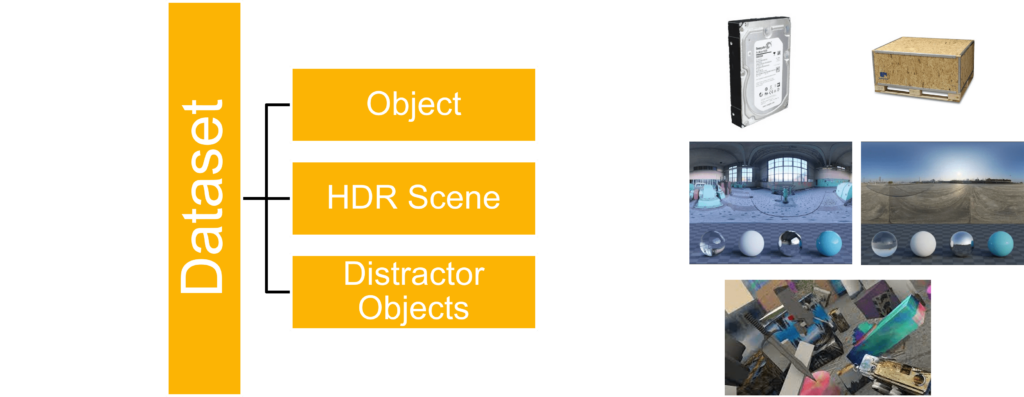
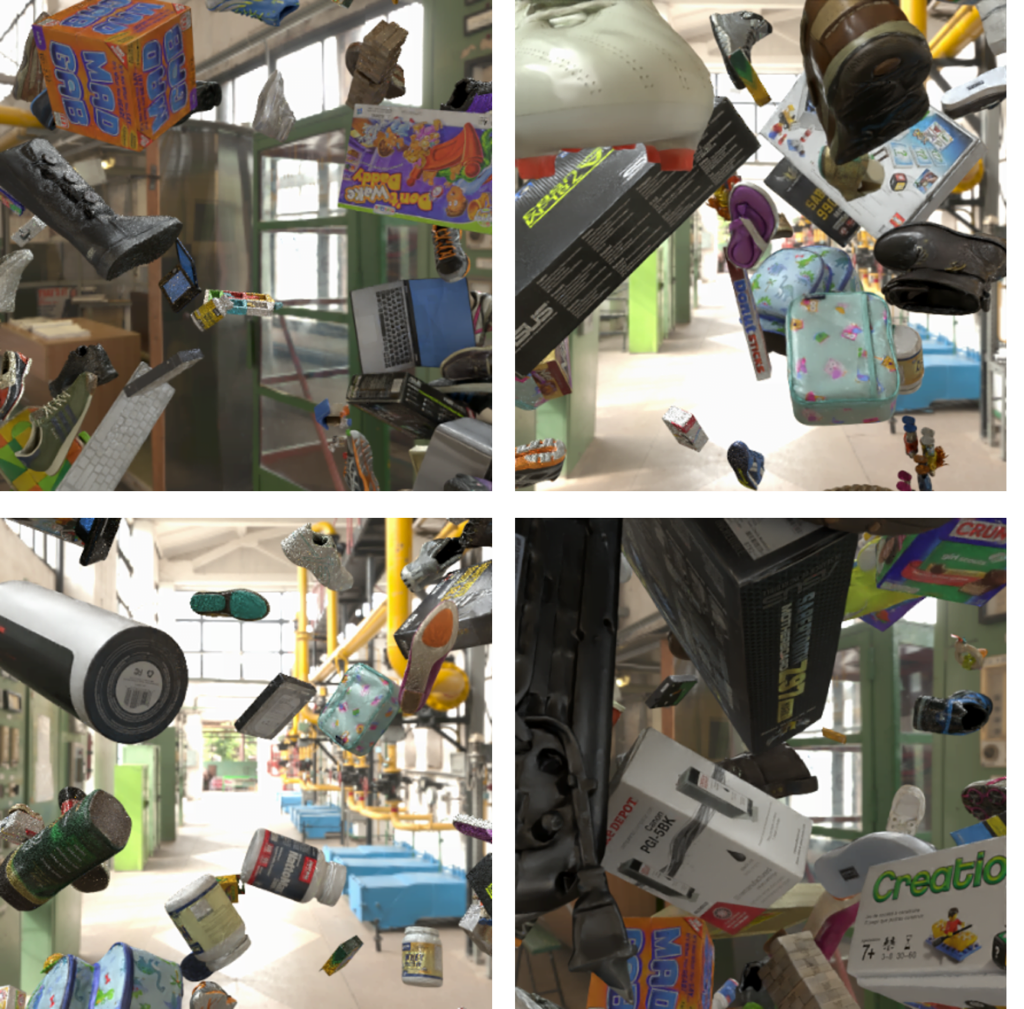
In the case of this demonstration, a hard drive will be used as the object to locate. Two different HDRI scenes are downloaded (link) and multiple distractor objects as well. Google scanned objects provides a free dataset from which these models can be downloaded. The HDRI scenes should be put inside the dome_hdri_haven/ folder, the distractor dataset can be downloaded using the download_google_scanned_objects.py script. You can also use Google scanned objects as the object to locate, however, keep in mind to change single_video_pybullet.py accordingly.
To generate the dataset, use the provided generate_dataset.py script and change the parameters according to your requirements. Then, you can start the generation by executing the generate_dataset.py script. The files will be located in the output/dataset/ directory. And should look similar to this:
Training
To train the network using the new dataset, execute following command:
- python3 -m torch.distributed.launch –nproc_per_node=1 train.py –network dope –epochs 2 –batchsize 10 –outf tmp/ –data ../nvisii_data_gen/output/dataset
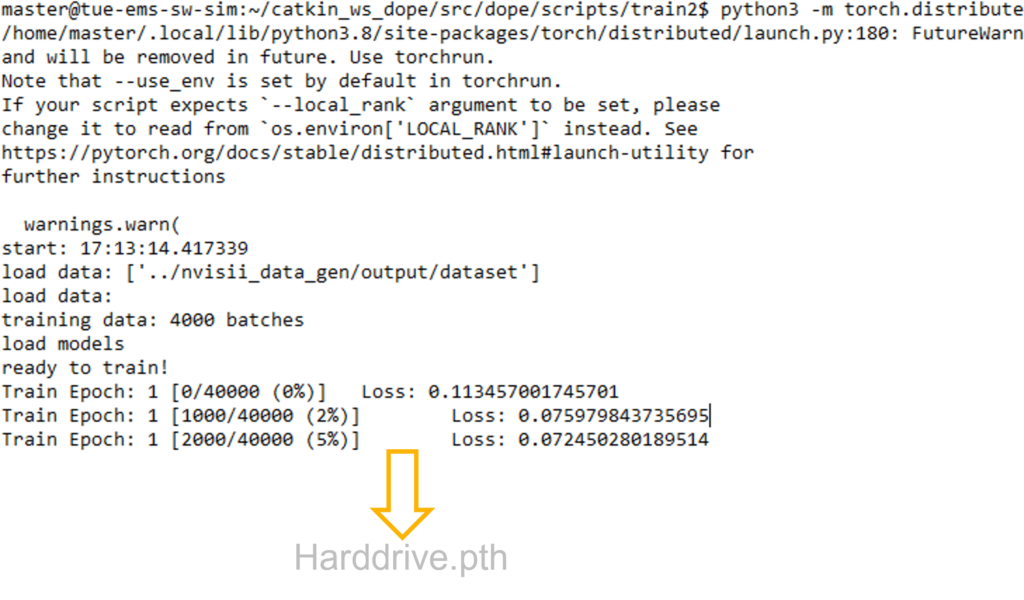
When finished, you will find the newly created weight file in the tmp folder. Now that we have the model, let’s try to run it!
Inference
Rename the new trained weights of the network (located in the tmp/ folder) and move them in the weights folder. To use the newly generated weights, keep in mind to change the config_pose.yaml file accordingly (add the path and name to your weight file). After the changes are saved, proceed with the steps described in the “Usage with Pretrained Models” section. In my case, the output of the Harddrive_belief-image topic looks like this:
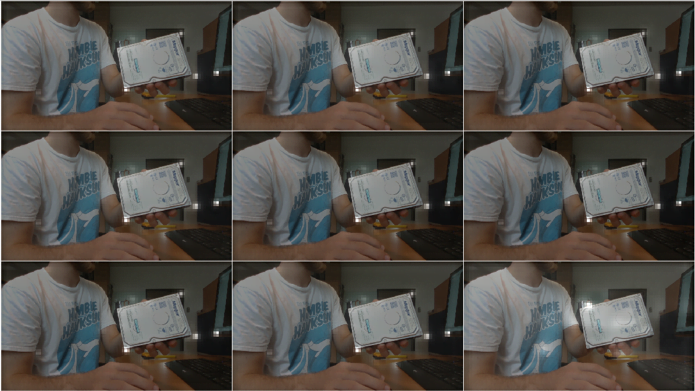
As you can see, the model is able to estimate the edges of the hard drive and with that the 6DoF position. Note that there are false positives (like the edge of the monitor on the right), but this can be mended, by training the network with more generated images and running more epoches. The position is pubished to the /positions topic of your ROS application.
As this was the last project of my internship, I was not able to do more tests on the network. I hope though, that this post has inspired you to try it out yourself. I’m eager to learn of your applications. The accuracy in the pose estimation has not been tested yet, however, with decend performance, this is a game changer in the field of robotics and computer vision. The Roboost project will most certainly make use of it!
To-Do and Open Questions
As stated above, there are still a lot of open questions.
- Most dominant of which is how accurate this approach is. For this, the published poses will need to be matched to measurements in the real world.
- Another point to tackle would be to incorporate the depth data of the realsense camera in order to improve the precision of the object estimation.
- Also, how will this AI perform on an edge device like the Jetson Nano?
I’m eager to face these problems and implement this network into the next version of my Roboost robot. Untill then, please share your thoughts and questions in the comments! Thank you for sticking around! 🙂