What were the problems?
- Always needing to adjust the bed leveling (BL-Touch, new Control Board for custom Marlin config)
- X-axis is sloped due to only one Z-rod (Dual Z)
- Z-axis easily jams once a bit of force is put on it (Anti-kickback springs, linear rails)
- As the 3D printer is usually in my cellar, I always have to go downstairs to start and check a print (Octoprint, Camera)
- When using Octoprint, I do not want to keep my lights on (Neopixels)
- And I do not want to run out of filament mid-print (Filament Sensor)
- Belts are not tensioned correctly (Belt tensioners)
- I want to try out CNC milling and engraving
- Stiffness needs to be increased (linear rails, 20×40 mm X-axis extrusion)
What I used:
- The base Creality 3D CR-10 (duh)
- Z-axis upgrades:
- General upgrades:
- For the linear rail upgrades:
- 20x40x420 mm aluminum extrusion
- Depending on the extrusion, you need either
- These T-nuts
- or those (please check if they fit with your aluminum profile, I didn’t)
- X-axis linear rails (MGN9H-350 mm H-Type)
- Y-axis linear rails (HGR15-500 mm)
- Z-axis linear rails (MGN9H-450 mm H-Type)
- ~90×90 mm aluminum sheet (at least 3 mm thick)
- I also recommend getting a few of these hex screws
- For OctoPrint:
- A Raspberry Pi (or any SBC) + power supply and SD card
- A mini USB cable (remove the 5V pin of the USB A connector, so that the RasPi does not power the Control Board)
- Any USB Camera (I use this one)
- For the CNC spindle:
For the X gantry, I chose to use a 20x40mm aluminum extrusion, as it would be stiffer against torsion. As the previous 20x20mm extrusion had a different profile, I had to cut out more of the middle groove, so that the timing belt would fit in there.
The major changes of the x-gantry were:
- new 20x40mm extrusion
- two linear rails instead of these wired rollers
- custom 3d-printed Z connectors
- new aluminum carriage with additional spindle mounting holes
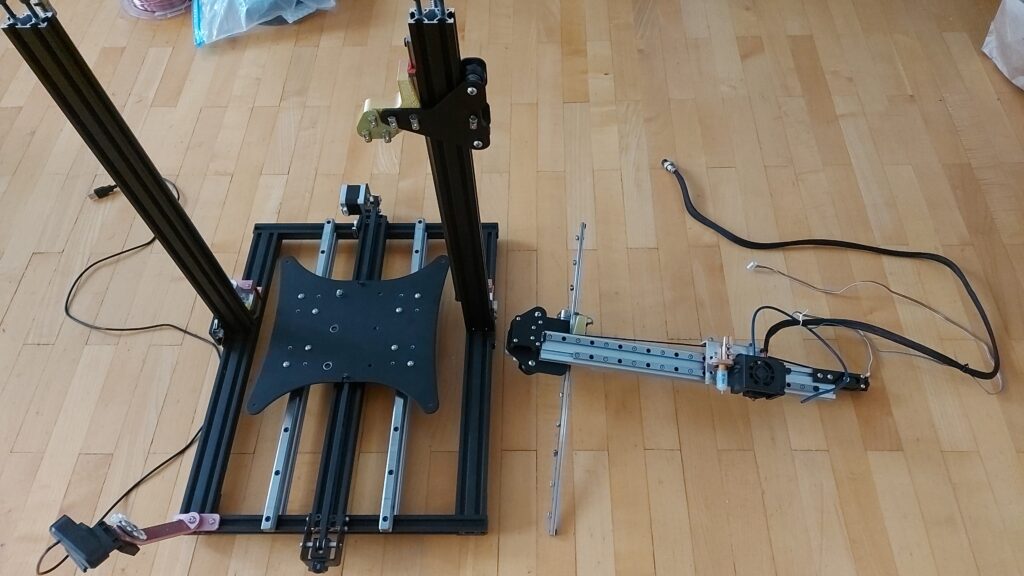
Here you can see the finished gantries before the final assembly. Note that for the Y and Z gantries, the rollers were also replaced with linear rails.
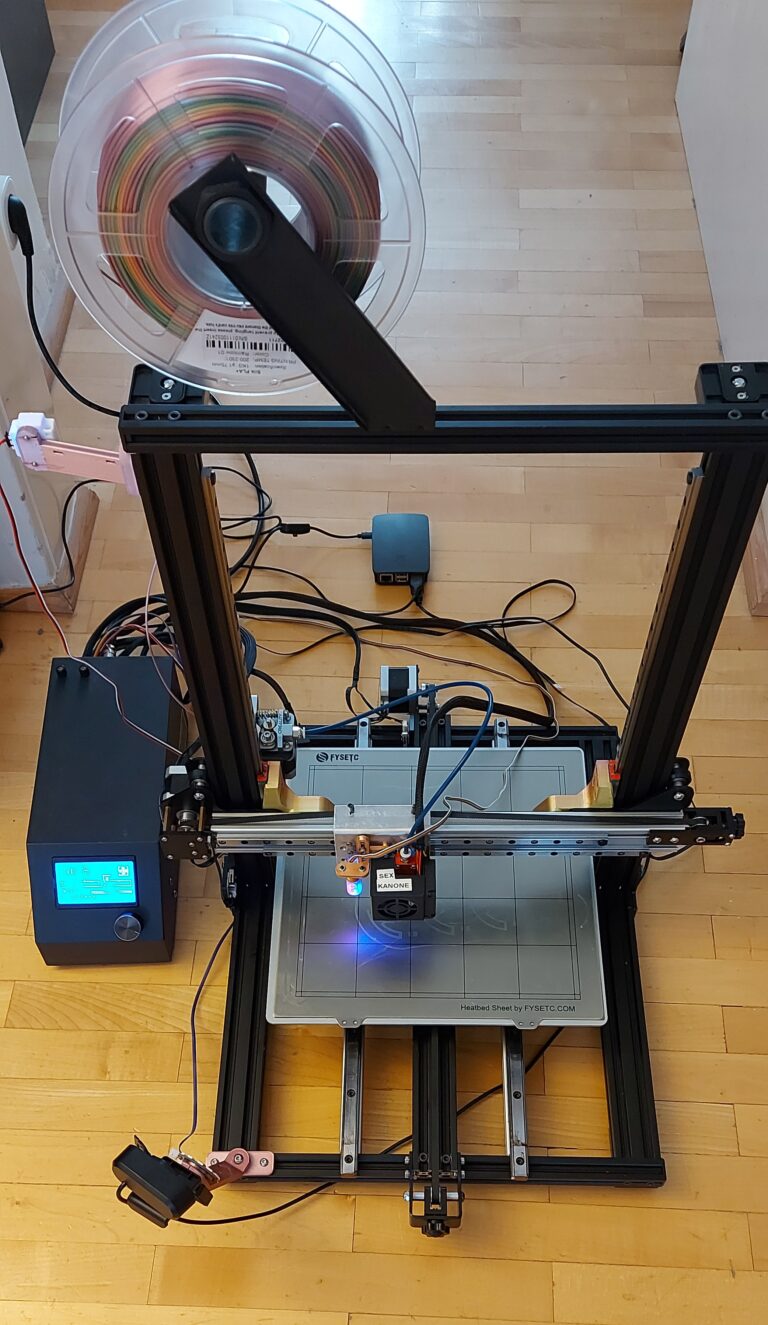
After some changes to the Marlin firmware (here is the link to the modded firmware with changes), I was able to start printing again using the BL-Touch, the filament runout sensor, and Octoprint.
Here you can see the two different configurations, 3D printing on the left and CNC machining on the right.
To create the gcode for simple cnc jobs, you need some sort of CAM software. Usually these are integrated in the standard CAD softwares like Solifowrks, Fusion or FreeCAD. As I recently switches to Linux for my main OS, I also had to swap from Solidworks to something that runs on Linux. In this case a chose FreeCAD and the built in Path tool.

After creating the 3D model and path, I exported the gcode with grbl set as the preprocessor and simply put the program straight on octoprint. From there, I can simply start the machining my setting the home position according to the postion i set on the CAM software and started the spindle and pressing play.
And here you can see one of the first machining jobs done with the machine. I did not really have the right nuts for screwing the part in place, so I used double-sided tape for a quick trial run. In future jobs, ill put a wooden plate underneath the raw material.
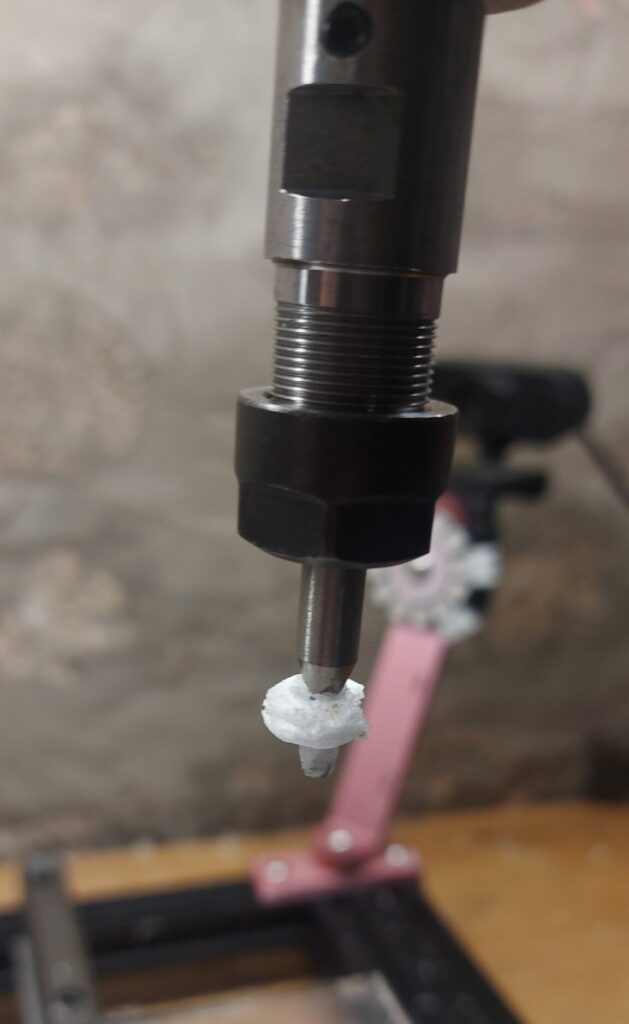
After cutting the acrylic plate, there was a sticky residue on the cutter. Has anyone any suggestions on how to prevent this? Or is it simply not recommended to cut acrylic with a CNC (but rather with a laser)?
What there is to do:
- Make CNC and 3D printing hotend easily swappable
- Try out CNC engraving with a spindle motor
- Make bed adjustable for either 3D printing or milling
- Upgrade Hotend
- Upgrade Cooling system